How to Make Rye Whiskey: A Distillers Guide
Learn Step-By-Step How To Make Your Own Homemade Rye Whiskey
In this how-to guide, we’ll be walking you through, step-by-step how to make rye whiskey from scratch. The tradition of distilling rye whiskey has been passed down for generations. Starting over 1,000 years ago when the practice of distillation migrated from mainland Europe into Scotland and Ireland. Whiskey production methods vary widely between different locations and distillers creating whiskey.
We’ll start by covering the basics of how to create a whiskey mash and the different variations that they come in. All of the supplies you’ll need for distilling your own homemade rye whiskey can be found in our shop. If you’re more of a rum drinker, then check out our guide on how to make rum.
At Mile Hi Distilling, we supply people who are passionate about spirits with the helpful guides and top quality distilling equipment. Learning how to make a great batch of rye whiskey requires a lot of time, practice and attention to detail. Be sure to plan thoroughly and execute carefully to get the most out of your whiskey run.
***Before we get started. It is illegal to distill spirits at home. This guide is meant as a hypothetical walk-through. Mile Hi Distilling doesn’t condone any illegal or illicit behavior and cannot be held responsible for the actions taken by any individuals not acting within the parameters of the law.***
Browse By Step. Click on any of these links to jump to the step you want to see:
A Background on The History of Whiskey
Getting Started: Picking Your Rye Whiskey Mash Ingredients
How to Make Rye Whiskey: Mash Recipe
Fermenting Your Rye Whiskey Mash
Distilling Your Rye Whiskey
Collecting Your Rye Whiskey Distillate
Aging Your Rye Whiskey
Testing Your Rye Whiskey
Conclusion
A Background on The History of Whiskey
Whiskey’s origin lies somewhere between 1,000 and 1,200 AD when traveling monks migrating across Europe, introduced the distillation practice into Scottland and Ireland. Because of the lack of vineyards in these countries, the monasteries turned to fermenting grain mashes and then distilling them into whiskey.
For the next 400 years, whiskey spread throughout the Celtic countries, being referenced by kings and warriors in historical texts. In 1536, King Henry VIII dissolved the monasteries who had been distilling the majority of whiskey up until that point. This made monks independent and required them to now make a living for themselves. They saw distilling as a way to make that living. In 1608, the first officially licensed whiskey distillery ‘Old Bushmills Distillery‘ was founded in Northern Ireland.
American Whiskey
As European settlers arrived in early America, they also brought the art of distilling whiskey with them. This gave rise to using a variety of different grains to create new and different whiskey mashes. During the American Revolutionary War, distillers used whiskey as a common form of currency as it was highly valued in the newly formed country. In the 1780s whiskey distilleries began to spring up in Kentucky and Tennesee giving birth to a bustling industry.
In 1840, the development of corn whiskey became very popular and a distiller, Jacob Spears was the first to label his batch ‘bourbon whiskey.’ From 1920 through most of 1933, the American Prohibition made owning or the use of whiskey illegal. The 18th amendment to the constitution banned all production and use of alcohol. This was a dark time for whiskey as the use of alcohol became more dangerous, the crime rate skyrocketed and was more organized. In December of 1933, the 18th amendment was repealed with the ratification of the 21st Amendment.
Flash forward to 1964, when Congress declared ‘bourbon whiskey’ the official distilled spirit of the country. Hooray!
Getting Started: Picking Your Whiskey Mash Ingredients
Like we mentioned above, whiskey is a spirit which has many different varieties and styles. The biggest variations between different whiskeys lie in their mash ingredients. A whiskey mash can be made with corn, rye, wheat, oats, maize or barley. By mixing percentages of these ingredients you can create a range of different tastes and flavors. Bourbon, for example, must contain at least 51% corn in order to be called a bourbon whiskey, while ‘Rye Whiskey’ must have 51% rye included in its mash to be classified as a Rye Whiskey.
For this distilling guide, and keeping with an American tradition, we’ll be using the same mash bill that George Washington’s distillery used to create his Rye Whiskey at Mount Vernon. It consists of 60% rye, 35% corn, and 5% barley. Rye gives the whiskey a range of spicy notes including pepper, nutmeg, clove, caraway, and cinnamon. These flavors are all intensified during the aging process, which gives the whiskey it’s bite. Corn (maize) is responsible for the sweeter tones in the whiskey’s flavor. The barley is added to the mix as a way to help convert starches to sugar for the fermentation process and also provides an underlying malty and chocolate flavor.
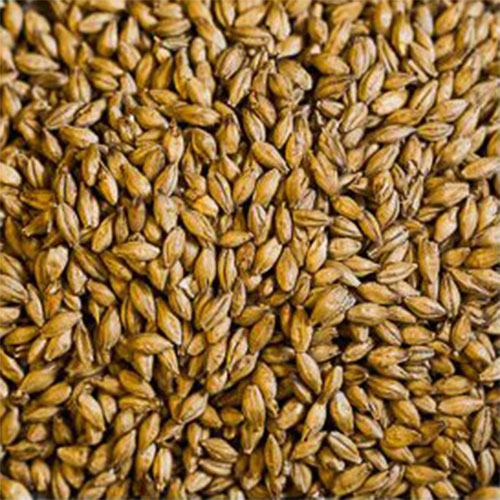
Rye
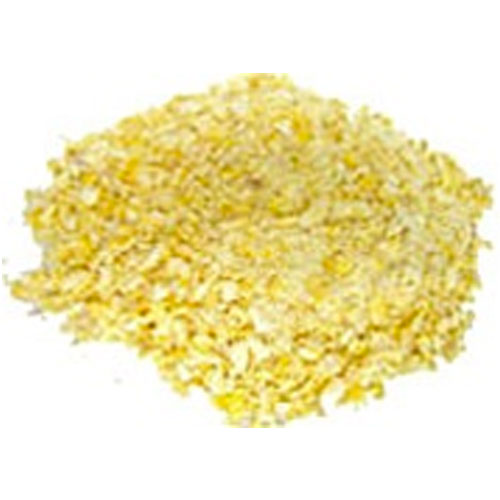
Corn
Barley
How to Make Rye Whiskey: Mash Recipe
Base Ingredients & Materials
- 5 Gallons of Water
- 6 Pounds Rye Malt
- 3.5 Pounds Flaked Maize (Corn)
- .5 Pound Malted Barley
- Whiskey Turbo Yeast
- Brew Mash Pot
- Fermentation Bucket
- Heat Source
- Thermometer
- Long Spoon
Rye Whiskey Mash Procedure
- Place your brew pot on its heat source and pour in 5.5 gallons of water.
- Heat water to 165 °F.
- Turn off heat source when you reach 165 °F and immediately stir in 6 pounds of Rye Malt and 3.5 pounds of Flaked Maize.
- Stir the mixture continuously for 7 minutes.
- Check temperature and stir mixture for 30 seconds every 5 minutes until the temperature cools to 152 °F.
- When the mixture has cooled to 152 °F, stir in .5 pounds of Crushed Malted Barley.
- Check temperature and stir for 30 seconds every 20 minutes until the mixture has cooled to 70 °F. This process takes several hours on its own but can be sped up significantly with the use of an immersion cooler.
- When the mixture has cooled to 70 °F, add whiskey turbo yeast.
- Aerate the mixture by dumping it back and forth between two separate containers for 5 minutes.
- Pour the mixture into your fermentation bucket. We carry complete fermentation kits for these as well as the materials to produce your own. It is important to have the bucket, cap, and air-lock. A spigot also makes for easier pouring.
George Duncan over at Barley and Hops Brewing also has a great video on How To Make Rye Whiskey. Check it out below!

Fermenting Your Rye Whiskey Mash
Materials
- Iodine (Optional)
- pH Meter (Advanced)
- Siphon
- Cheese Cloth
- Citric Acid
Fermentation
Store your rye whiskey mash to ferment for 1 to 2 weeks. For the best results, use one of the methods outlined below to ensure successful fermentation.
Quick Check: After 1 week of fermentation, take a bit of liquid (no solids) from the top of your rye whiskey mash. Put the liquid on a white plate or lid. Drip several drops of iodine into the liquid.
If the liquid turns blue, this is because the iodine has reacted with starches still in the whiskey mash. This indicates that the mash still needs to be fermented further. Repeat this process every few days until fermentation is complete (no blue liquid).
Note: Discard your test sample. Do not add it back into your whiskey mash!
Straining
Siphon some mash water out of your mixture, taking care to leave behind all solid material and sediments, and into a container to adjust pH. At this step, you should use a cheesecloth to strain your mash water. Leaving solid materials or sediment in your whiskey mash water can cause you a really bad headache.
(Advanced Tip!) Some distillers will add 2tsp of gypsum to their mash water at this point. They then test the pH of their mash water. The ideal pH is 5.8 to 6.0. Use citric acid to adjust the pH down and calcium carbonate to bring it up.

Distilling Your Rye Whiskey
Materials
- Whiskey Moonshine Still
- Fermented and Strained Mash Water
- Cleaning Products
- Column Packing
You’ve made it this far! At this point, you’ve completed the heavy lifting of producing your whiskey mash water for your rye whiskey! Now it’s time to distill and separate all of that alcohol content into a purified form. Just like making mash, distilling is as much an art as it is a science.
The best way to master the art of distilling is to hone your skills with practice. We recommend taking detailed notes throughout this process so you can become better with each run. If you’re in need of any distilling equipment or supplies we’ve got you covered.
The process of distilling the fermented whiskey mash will make for a purer and more concentrated spirit. This step separates out all of the undesirable types alcohols such as acetaldehyde, acetone, and methanol (which can cause blindness if consumed).
Prepping and Cleaning Your Whiskey Still
*DO NOT SKIP THIS STEP!
Keeping up on prep-work for your still is mission critical. Even if you cleaned your whiskey moonshine still after your last run and let it sit for a while, it is still recommended to clean it before transferring your whiskey mash water. This is especially the case on copper stills that are starting to show a salt buildup.
If you want to add packing to your column, this is the time to do it. Pack your column with the amount of copper packing that is appropriate for your setup.
If your still setup has a condenser, hook up your water input and output.
Finally, it’s time to add your mash water to the whiskey still. Again, you can use a cheesecloth or auto-siphon to transfer the mash water into your still without including solid material. It’s very important that you don’t allow any solids or sediment to be included in the still.
If this is your first run ever, below is a great walkthrough of how to set up your pot or reflux whiskey moonshine still.
Running Your Whiskey Still
Now for the step you’ve prepared for. Distilling rye whiskey is an incredible process. If you’re not familiar with the science, here is a quick break down. Distillation is the process of separating different alcohol chemicals by taking advantage of different evaporation temperatures points between the chemicals.
The distilling process is not creating the alcohol, it is simply separating it from all of the other substances in your whiskey mash water. Therefore distilling it down to a purified spirit. The alcohol was already created during the fermentation step.
Slowly bring your temperature up to 150 °F. Once you reach 150 °F, turn on the condensing water, if your setup has a condenser.
After that, dial up your heat source to high until your still starts producing. Time your drips as they speed up until you reach 3 to 5 drips per second. Once you reach this rate, dial down your heat to maintain this drip rate (usually the “medium” setting).
Collecting Your Rye Whiskey Distillate
Collecting your rye whiskey distillate is the best part of this entire process. This is where the magic happens! A mixture of accurate calculations and good instincts, this step takes an experienced distiller to get this process down perfectly. That being said, don’t let this deter you if you’re new to distilling whiskey. After you run a few batches with your whiskey still, you’ll be able to dial the process in by taking notes and making the necessary adjustments. As the old adage goes, “Practice makes perfect.”

Congratulations, you’re well on your way to making your own rye whiskey! As you’re producing the distillate in this step, be sure to use a glass container. Never use plastic containers for this step because they may lace your product with BPA.
Collecting Foreshots
The first approximate 5% of your production will be the foreshots. These contain the earliest-evaporating alcohols in your mash water and should be thrown out.
Foreshots can contain an alcohol known as ‘methanol’ and should never ever be consumed. Methanol can cause blindness if you drink it. Collect the foreshots in their own container and throw them out.
Collecting Heads
The next approximate 30% of your distillate is known as the heads. The heads also contain some volatile alcohols just like the foreshots. As a result, they should be thrown out as well because they are toxic to ingest. They are less toxic than the foreshots, but the heads can still cause a horrible hangover.
The heads will have a distinct “solvent” smell from alcohols such as acetone. Like the foreshots, collect your heads in their own containers and throw them out.
Collecting Hearts
The next step in collecting your distillate is the hearts. The hearts make up the next approximately 30% of your production and are mostly ethanol. During this step, the distillate should lose its harsh, solvent smell that was present during the heads.
This is the stage where skill and knowledge come into play. Isolating your hearts and maximizing your production is a bit of an art. Using a balance of science and your senses will determine the quality of your whiskey end product.
Collecting Tails
The final stage of collecting your rye whiskey distillate is the tails. The tails will be approximately the last 35% of your production when you reach the end of the ethanol. The tails will taste noticeably different from the hearts.
First, you will notice a steep decline in sweetness. Then you can even begin to see an oily top-layer on the surface of your product. The distillate will begin to feel slippery between your fingers. This is because of the water, carbohydrates, and proteins present. You can either throw out your tails or set them aside for a second distillation.
Aging Your Rye Whiskey
Now at this stage in making your own rye whiskey, you have a choice to make. Whether to age your whiskey or not. If you do decide to simply skip the aging process and bottle up the distillate, you have technically made a moonshine or white whiskey. However, since the goal of this guide is to make a true golden rye/corn whiskey, we’re going to cover a bit on the aging process as well.

The aging process will drastically affect the overall flavor profile of your rye whiskey. By aging your whiskey in a charred oak barrel or using oak chips for a given period of time, it will give the whiskey its golden coloring and it will absorb the oaky flavors. A chemical process called adsorption also takes place during aging. This process is when the molecules that make a young whiskey harsher are drawn out to the barrel’s wall, and result in a smoother overall spirit. Many distillers will use barrels which have been used to age other spirits such as rum or brandy to give their whiskey a distinct flavor profile.
How Long To Age Your Whiskey
The amount of time that you decide to age your whiskey is completely up to you. Generally, a rye whiskey will be aged from 1 to 3 years. In this time the barrel or bottle that you’re aging your whiskey in should be kept in a cool and dry environment.
At Mile Hi, we have a variety of different oak barrels, oak chips, and oak spirals to allow you to capture the exact aged flavor profile for your spirits.
Testing The ABV of Your Rye Whiskey
After the aging process, you should test the ABV (Alcohol By Volume) of your rye whiskey and dilute if necessary. You can use a hydrometer to do this. You can dilute the whiskey with purified water prior to bottling it if the ABV is too high. Rye Whiskey must have a minimum of 40% ABV (80 Proof) to be classified as a rye whiskey.

Conclusion
Great Job! You’ve gotten through this entire guide, which means you’ve just made your own batch of delicious homemade rye whiskey (hypothetically speaking). We hope this walkthrough guide was helpful and you churned out a top-shelf spirit. Now comes the cleanup step. Be sure to wash every piece of equipment down thoroughly to ensure a high-quality product in future runs. Disassemble your still and store it in a cool, dry place.
Thank you for visiting Mile Hi Distilling, your one stop shop for all of your whiskey distilling needs. Don’t forget to check out our shop for any supplies or equipment you may need for any future distillations. We hope you enjoyed learning how to make whiskey.
If you enjoyed this guide on how to make rye whiskey, check out our other guides on how to make rum and how to make vodka.
Let us know what you thought of this guide by leaving a comment or a star rating below.


